You do not have to sacrifice eating or making bread
One of the first casualties in any catastrophe is the food supply.
Not only will the catastrophe knock out manufacturing plants, bakeries, etc., but people will grab what they can and hoard it.
Before long store bought yeast will be unavailable as grocery store shelves empty.

The good news is that even in these tough times, you can still make good bread and have a delicious supply of homemade bread when everyone else is fighting for what is left on the shelves.
All you have to do is pick one or more of the following recipes and follow the instructions.
Once you master the process, your family won’t be without good bread to eat.
Let’s look at how to how to make yeast at home
5 Different recipes you can follow to make your own yeast
It pays to have more than one recipe on hand to make yeast.

If you do not have the ingredients for one recipe, you may have them for another one.
How To Make Yeast At Home Options:
1. Homemade yeast or starter
This is the first basic recipe.
Starter is another term for yeast and this recipe should take about 8 days to complete.
Ingredients:
1 1/2 cups of mineral or filtered water– no tap water as the chlorine will kill the needed bacteria
1 tablespoon of sugar
1/2 cup of chopped or whole raisins
1 quart-sized mason jar
Plastic wrap
Instructions:
On day one you need to add the water, raisins, and sugar to the mason jar.
Cover the jar with plastic wrap and store it at room temperature for 7 days.
No mixing is required.
On day eight you strain the raisin water and remove all the raisins.
Then mix the raisin water with 1 cup all-purpose flour and 1 1/4 tsp of sugar.
Keep it in a warm location till it rises and it should be double its size.
Then place it in the fridge.
Then use it when you need to.
You can also feed the starter to keep it going by adding ⅔ cup lukewarm water and ⅔ cup all-purpose flour.
Before you do that step, you are to remove 1/4 cup of the starter and get rid of it.
Return to the fridge.
Yo, use it you do the same step even if you have fed the starter for that week.
Then keep the starter out at room temperature till it doubles in size.
After that, bake your bread using the starter.
2. Flour & water yeast
Ingredients:
1/4 cup of whole wheat flour
1/4 cup water
Baking tools needed:
Small bowl
Spoon
Lid or towel
Instructions:
One- Mix your flour and water in the small bowl till thoroughly mixed together
Two- loosely cover the mixture, leaving it in the bowl, and let it sit on your kitchen counter
Three- add one to two tablespoons of water and flour twice a day, morning and evening, and do this for three to five days.
This will start the bubbling action.
The gas should double the yeast or starter in size by the 5th day and it will be ready to use at that time.
Make sure to test the yeast by putting it in water.
When it is fully ready it should float.
You do not have to use this starter right away.
You can store it in the fridge and feed it once or on your kitchen counter if you feed it every day.
3. Sourdough starter
This is an interersting bread recipe that starts with your own yeast.
Ingredients:
Quart-sized, wide-mouth, mason jars
Water- non-tap water
All-purpose flour- can be unbleached organic if you want.
Whole wheat may produce an off-flavor to the starter
Cheesecloth to cover the jars
Instructions:
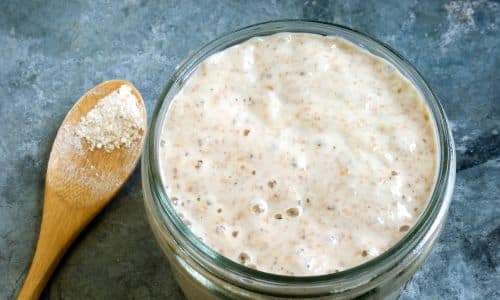
Day one- mix 1/2 cup of flour and water in the mason jar.
You want the consistency of pancake batter but if the mixture is too thick or thin, add flour or water till you get that consistency.
The consistency of the mixture is more important than the amounts used.
Once you have it use the cheesecloth to cover the jars.
Day two- feed the starter by adding roughly 1/2 cup of flour and water again.
Your goal will be to mix and add till you get the right consistency.
Stir and then cover again.
Day three- you should start having bubbles forming on the top of your starter. Just repeat day two’s instructions for this day’s step.
Day four- feed the starter again but by now, it should be ready for baking.
Depending on where you live in the country, will determine when your starter is ready.
It may be a bit later for some regions of the country.
You can put the starter in the fridge and feed it less or put it on the counter and feed it more. It is up to you.
One good thing is that if you feed it regularly, this starter can be used for up to 7 years.
Some people freeze their backup starter when the original fades.
Wild Yeast for baking bread
To make a “sourdough starter,” you will actually be catching wild yeast and bacteria that are already in the air or in the flour.

Before commercial yeast became available less than a hundred years ago, bakers used this method.
People who have some free time seem to be baking their own bread.
It is definitely better for you than most store-bought breads.
You can grow wild yeast at home with just a few simple ingredients.
Once it has been grown, you can either dry it out to make dry yeast or just use the starter to make your own bread.
The main ways to make yeast are: using dried or fresh fruits, potato water, flour, and other ingredients
4. Flour and Curd
Ingredients:
½ cup lukewarm water
1 Tbsp honey
1 Tbsp sugar
2 Tbsp flour
2 Tbsp curd
Baking tools you will need:
Medium-sized bowl
Spoon
Plastic wrap
Instructions:
Step one- add the honey to the water and stir until completely dissolved
Step two- Add the sugar to the honey and water mixture and stir till dissolved.
Set aside for now.
Step three- add the flour and curd to the small bowl and mix to a thick paste
Step four- now take your sugar, honey, and water mixture and SLOWLY add it to the flour and curd mix.
Stir as you pour and make sure no lumps are in the mixture
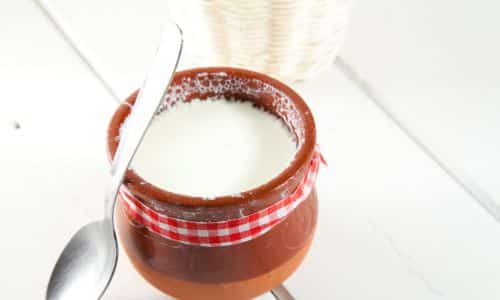
Step five- once this is all done, cover the bowl with plastic wrap and leave it at room temperature for 24 hours.
After that, the starter should be ready to use.
Since you only need a 1/4 cup of warm water, you can mix the honey and sugar with the water right in the measuring cup.
That will make it easier to add to the flour and curd paste you created in the third step.
5. Yeast from Potatoes:
Ingredients:
1 unpeeled medium-sized potato
4 cups warm water
1 teaspoon salt
1 teaspoon sugar

Baking tools needed:
Masher
1-quart jar
Lid
Instructions:
Step one- wash the potato but make sure to keep the skin intact.
Step two- cut the potato into small pieces and then boil the potato till it is cooked.
Make sure the potato is cooked through.
Step three- drain the pot but save the water
Step four- Add the salt and sugar to the potatoes and mash everything together.
Once mashed, set aside and wait for the potatoes to cool.
Step five- add the water to the mashed potatoes and add enough water so that your mixture equals one quart
Step six- cover with a lid and let the mixture ferment for several days.
Make sure you leave it in a warm spot during this time.
Homemade yeast tips & information
#1. Did you know that the yeast you buy in those little yellow packets was not invented until 1868?
Prior to that time, every baker and housewife used homemade starter.
#2. To get even more recipes, you should look for some pre-1870s cookbooks.
After 1868, it took a while for recipes to include the new yeast style.
Those older books will give you lots of good homemade yeast options if you understand the terminology.
#3. Emptyings- this is the leftover dough that is put into another jar or crock pot.
Then add water or milk to the mixture of flour and water.
#4. You can make yeast out of hard cider, beer, hops, and so on.
#5. If you use tap water, the chlorine and other chemicals in that water supply will kill off the bacteria needed to create the yeast.
#6. Waxed or washed fruit may not be as effective as other kinds of natural fruit options.
#7. While there are different types of yeast available the Saccharomyces cerevisiae, or S. cerevisiae is the one used to make bread or do other baking.
Yeast is part of the fungus family and uses sugar to do the fermenting process.
#8. Yeast can be made from different fruits and vegetables.
Since yeast is found naturally in the skins of different fruit, you generally want to leave the skin on when you are making your homemade yeast.
Some of those fruits and vegetables are- potatoes, grapes, apples, dried fruit, and even some herbs that are found in the wild, for example- mint.
#9. If you can’t find yeast in those little packets, you can substitute one tsp of baking powder for every cup of flour you use.
But this is not for kneaded bread baking items.
Fresh vs dry yeast
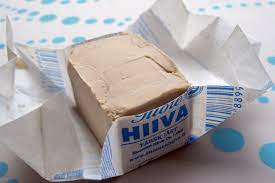
The viscosity of fresh yeast is similar to that of putty or kneaded eraser, as it is moist and putty-like.
Both active dry yeast and instant yeast have the appearance and texture of refined sugar or grains of polenta.
Active dry yeast is the more common form.

Duration of storage Active dry yeast has a shelf life that is significantly longer than that of fresh yeast.
When maintained at room temperature, active dry can be used for several months longer than it would if it were activated in warm liquid first.
However, active dry should always be activated in warm liquid before use, especially if it has been far past its expiration date.
Because fresh yeast needs to be kept in the refrigerator and has a short shelf life, using it in baking that calls for big quantities ensures that none of it will be wasted.
Some final words
Baking bread does not need to stop in survival situations.
You just need to know how to make yeast at home.
We hope this yeast starter type post has helped.
When you have the right recipes, you will find that making yeast is easy to do.
The most effort used will be time as it takes time for the mixtures to ferment to get your starter.
The yeast production recipes above are just the tip of the iceberg to get you on the right path to baking beautiful bread.
Which, are often tastier than commercial breads.
Look up very old yeast for baking recipes to get even more options.

Originally posted 2023-05-11 01:17:56.