Prepping for emergencies doesn’t have to break the bank.
You can make useful survival items at home with creativity and basic tools.
These DIY Prepper Projects let you build important preps without spending loads of money.
By making your own gear, you’ll save cash and learn valuable skills.
You’ll gain hands-on experience working with different materials and tools.
This know-how can come in handy during actual emergencies.
Plus, you’ll have custom preps tailored to your specific needs.
Let’s look at 10 budget-friendly DIY projects to boost your prepping efforts.


1) Tin can solar heater
Want to warm up your space without breaking the bank?
A tin can solar heater might be just the project for you.
This clever DIY uses recycled aluminium cans to capture and distribute heat from the sun.

To start, you’ll need about 30-40 empty cans, some wood for framing, and a sheet of glass.
Clean the cans and remove their tops and bottoms.
Paint them black to absorb more heat.
Next, build a wooden frame to hold your cans.
Arrange the cans in columns, connecting them with silicone sealant.
Attach a plywood backing to the frame, then place your can array inside.
Cover the front with glass to trap heat.
Add intake and output vents to allow air flow.
Place your heater in a sunny spot, angled towards the sun.
On sunny days, even when it’s chilly outside, your tin can heater can reach temperatures of 70°C or more.
It’s a brilliant way to cut heating costs and reuse materials you might otherwise throw away.
This project is perfect for warming up a small room or greenhouse.
It’s eco-friendly, budget-friendly, and a fun way to learn about solar energy.
2) DIY water filtration system
Clean water is crucial for survival. You can build your own water filter at home using simple materials.
This project is budget-friendly and can provide safe drinking water in emergencies.
One easy option is the bucket-style filter.
You’ll need a 5-gallon bucket, some gravel, sand, and activated charcoal.
Layer these materials in the bucket, with the coarsest at the bottom and finest at the top.
Another method uses ceramic filters.
These are more effective but may cost a bit more.
You can set up a gravity-fed system with food-grade buckets and a ceramic filter kit.
This type can produce 12-15 gallons of clean water daily.
For a basic filter, try using a plastic bottle.
Cut off the bottom, then layer coffee filters, sand, and charcoal inside.
This works well for small amounts of water.
Remember, these filters remove dirt and some contaminants.
But they might not eliminate all harmful microbes.
It’s best to boil filtered water before drinking when possible.
Building your own filter is a fun project that can teach you about water purification.
It’s a useful skill for camping trips or emergency preparedness.
3) Rocket stove from bricks
A brick rocket stove is a brilliant DIY project for preppers on a budget.
You can build one using just 25 bricks, making it an affordable option for off-grid cooking.
To start, gather around 28 bricks.

You only need 25, but it’s good to have extras.
Look for free bricks on Facebook Marketplace or Craigslist to keep costs down.
The design is simple yet effective.
Stack the bricks in a specific pattern to create a small combustion chamber and chimney.
This setup allows for efficient burning of small twigs and branches.
Building your stove takes less than two hours.
It’s a straightforward process that doesn’t require special skills or tools.
You can easily assemble and disassemble it as needed.
Your brick rocket stove will use less fuel than traditional campfires.
It also produces less smoke, making it ideal for both outdoor and emergency indoor use.
Add a small grate on top to support your cooking pot.
This creates a stable cooking surface for preparing hot meals or boiling water.
With your new brick rocket stove, you’ll have a reliable cooking method for emergencies or off-grid living.
It’s a practical addition to your prepper toolkit that won’t break the bank.
4) Homemade paracord bracelet
Paracord bracelets are useful tools for preppers.
They’re easy to make and can help in many survival situations.
You can create your own with just a few simple materials.
To start, you’ll need paracord and a buckle.
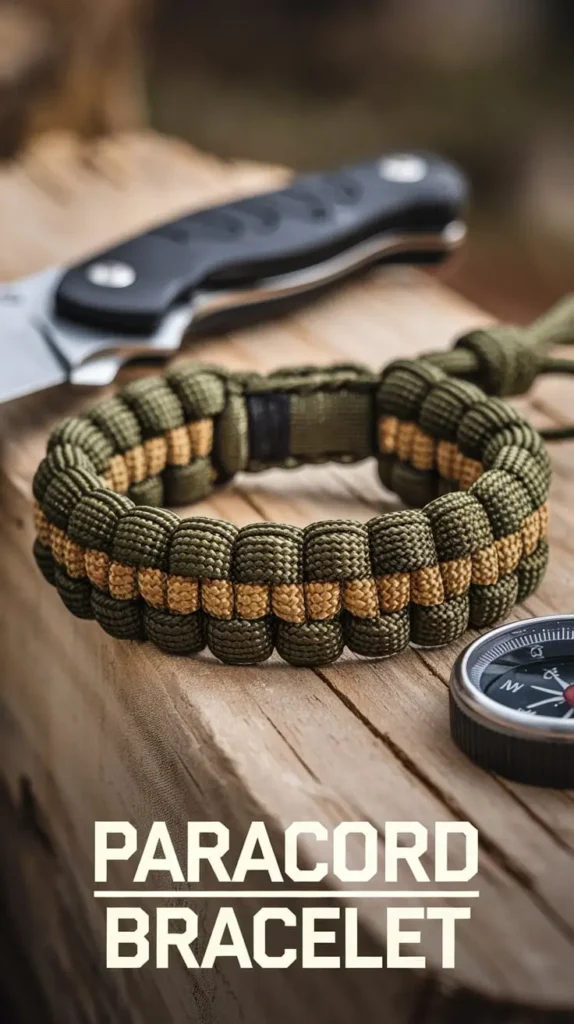
Measure your wrist and add about 1 inch for a good fit.
For each inch of bracelet, you’ll use about 1 foot of paracord.
The basic “cobra” weave is a good pattern for beginners.
It’s strong and holds a lot of cord.
You can find step-by-step guides online to learn this weave.
As you gain skill, try more complex patterns.
Some designs can hold small tools or fire-starting materials.
This makes your bracelet even more useful.
Remember, your bracelet isn’t just for looks.
In an emergency, you can unravel it for many uses.
The cord can help build shelters, tie gear, or even fish.
Making paracord bracelets is also a fun activity to do with friends or family.
It’s a great way to spend time together while preparing for the future.
5) Solar-powered USB charger
Building a solar-powered USB charger is a great DIY project for preppers on a budget.
This handy device lets you charge your mobile devices using free energy from the sun.
To make one, you’ll need a small solar panel, a USB charging module, and a battery pack.
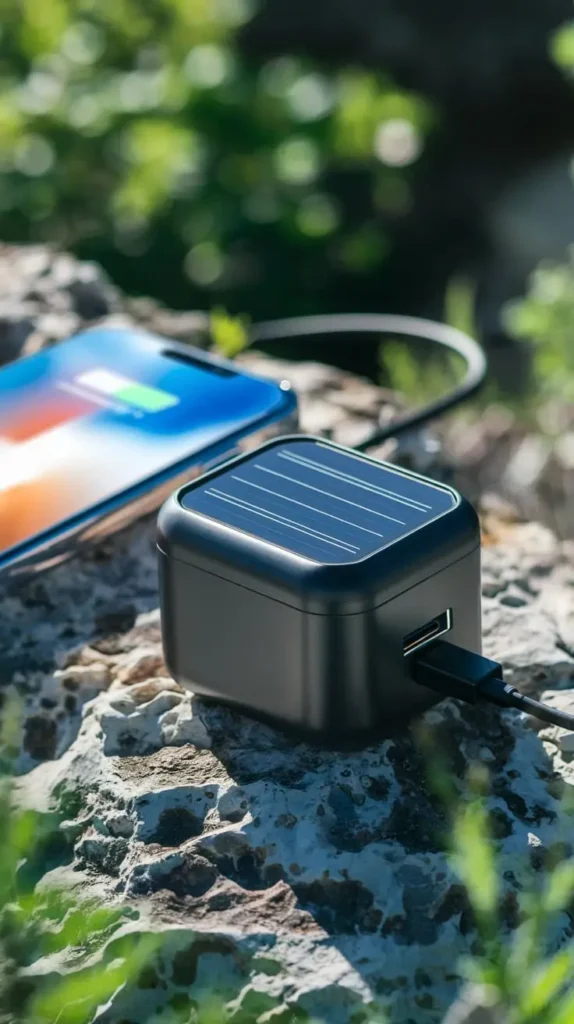
You can find these parts online or at electronics shops.
Start by connecting the solar panel to the charging module.
Then wire the module to the battery pack.
Make sure all connections are secure.
Next, attach a USB port to the battery pack.
This is where you’ll plug in your devices to charge them.
You can house everything in a waterproof container for protection.
An old plastic lunchbox works well for this.
When you’re done, place the charger in direct sunlight to power up.
It may take several hours to fully charge the battery.
This DIY charger is perfect for camping trips or power outages.
You’ll always have a way to keep your essential devices running.
It’s a smart investment in your off-grid preparedness.
6) PVC pipe hydroponics system
Want to grow fresh veggies without a garden?
A PVC pipe hydroponics system is your answer!
This DIY project lets you grow plants using water and nutrients instead of soil.
You’ll need PVC pipes, end caps, a water pump, and some basic tools.
Cut holes in the pipes for your plants and connect them to form a structure.
Add a reservoir at the bottom to hold water and nutrients.
The system can be as small or large as you like.
A basic setup might be 3.5 feet by 8 feet and hold up to 36 plants.
You can grow herbs, lettuce, and even small tomatoes.
One great thing about this system is its flexibility.
You can make it vertical to save space or create a zigzag pattern for more growing area.
It’s perfect for small flats or balconies.
Building your own hydroponic system is cheaper than buying one.
Plus, you can customise it to fit your space and needs.
With a bit of effort, you’ll have fresh veg at your fingertips all year round!
7) Wind turbine using old bike parts
Have you got an old bicycle gathering dust in your shed?
Why not turn it into a DIY wind turbine?
This project is perfect for preppers on a budget.
You’ll need a bicycle wheel, some wood for the frame, and a few basic tools.
The wheel acts as the turbine’s rotor, spinning in the wind to generate power.
Start by building a sturdy wooden stand to hold your turbine.
Attach the bike wheel to the top using bolts.
You can use pieces of aluminium or plastic cut into curved shapes for the blades.
Fix your blades to the wheel spokes, making sure they’re evenly spaced.
Connect the wheel to a small generator or alternator to produce electricity.
This homemade wind turbine won’t power your whole house, but it can charge batteries or run small devices.
It’s a great way to harness renewable energy and learn about off-grid power.
Remember to place your turbine in an open area with good wind exposure.
You might need to experiment with blade angles to find the most efficient setup.
8) Earthbag garden bench
Looking for a sturdy and eco-friendly seating option for your garden?
An earthbag bench might be just the thing.
This unique DIY project uses bags filled with soil or sand to create a durable structure.
To get started, you’ll need polypropylene bags, soil or sand, barbed wire, and some basic tools.
Begin by laying out the shape of your bench with a row of filled bags.
Add barbed wire between layers for stability.
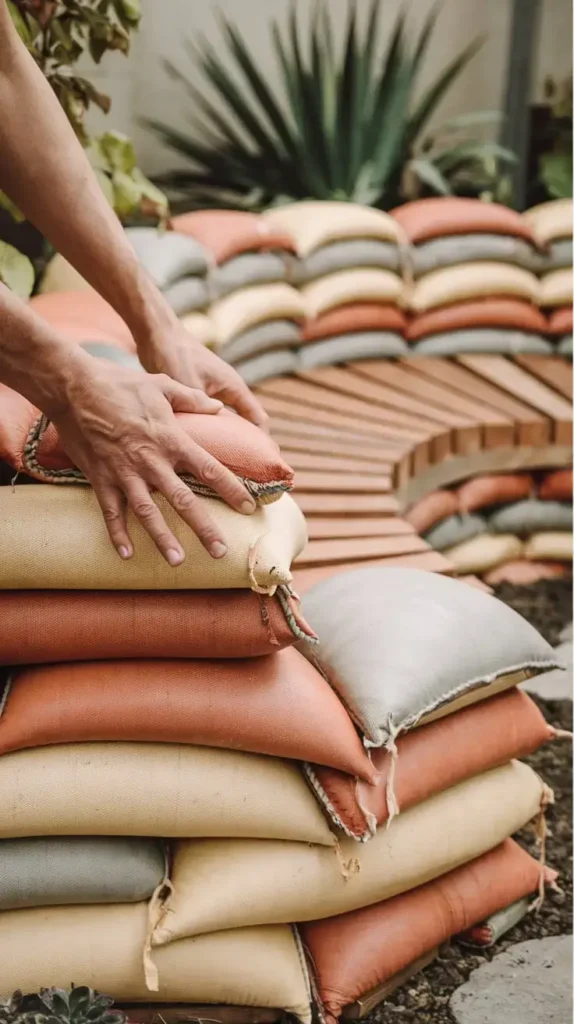
Build up the rows, making sure to tamp down each layer firmly.
You can create a curved or straight bench, depending on your preference.
Top your earthbag structure with a wooden seat or cushion for added comfort.
This project is budget-friendly and uses mostly natural materials.
It’s a great way to add seating to your garden while learning a useful prepper skill.
Plus, your earthbag bench will blend seamlessly into your outdoor space.
With some effort and creativity, you can craft a one-of-a-kind garden feature that’s both practical and eye-catching.
Give it a go and enjoy your new outdoor seating area!
9) Bicycle generator power supply
A bicycle generator power supply is a clever way to harness human power for electricity.
This DIY project can be a valuable addition to your prepper toolkit.
You’ll need an old bicycle, a car alternator, and some basic electrical parts.
Mount the bike on a sturdy stand to keep it stationary.
Connect the alternator to the bike’s wheel using a belt or chain.
As you pedal, the alternator produces electricity.
This can be stored in a car battery or used right away through an inverter.
It’s a great backup power source for small appliances or charging devices.
Building this generator is fairly straightforward.
You can find most parts at scrap yards or bike shops.
Online tutorials can guide you through the assembly process step by step.
You can power laptops, charge phones, or run small kitchen appliances with your bicycle generator.
It’s an eco-friendly way to stay prepared and keep essential items working during power cuts.
Remember to maintain your bike generator regularly.
Keep the chain oiled and check connections to ensure it’s always ready when you need it.
10) Survival candles from household items
Making a survival candle is a simple and cost-effective project.
You can create one using items you likely already have at home.
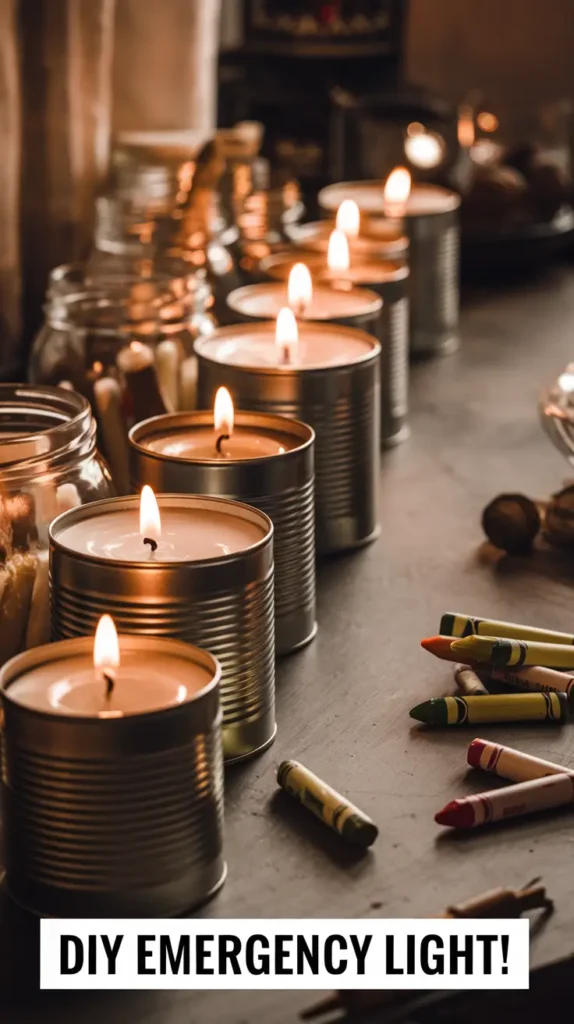
One easy method is to use an empty tin can.
Clean it thoroughly and dry it.
Next, gather some old candle stubs or crayons.
Break the wax into small pieces and melt it in a heat-safe container.
While it’s melting, prepare a wick by tying cotton string to a small stick or pencil.
Once the wax is melted, carefully pour it into the tin can.
Hold the wick in place by resting the stick across the top of the can.
Let the wax cool and harden completely.
Then, trim the wick to about 1 cm above the wax surface.
Another option is to use a small glass jar or even an empty tuna tin.
You can also add essential oils for a pleasant scent.
These DIY candles are perfect for power cuts or camping trips.
They’re easy to make and can provide light for several hours.
Remember to always use caution when working with hot wax and never leave burning candles unattended.

Originally posted 2025-02-23 07:53:15.